Using Dollar Tree Stickers to Make a Fun Peekaboo Card
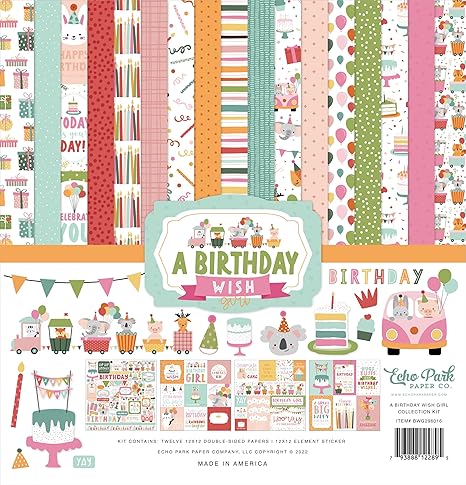
In this video project, I made a super fun peekaboo trifold Birthday card for my niece, using Dollar Tree Stickers, Echo Park: A Birthday Wish-Girl Collection, and Paper Wishes/Hot Off the Press Fabulous Folded Cards: Windows and Frames Cutting Die Set. All products used in making this project are listed below.


Measurements
Card Base: 5 ½ x 7” when folded
11 x 7”, Score at 5 7/16, 5 ½, 5 9/16”

Right Flap Panel Base: 6 x 7”, Score at 5 3/8”

Patterned Paper (4 Pieces-Front and Back of Main Card Base): 5 5/16 x 6 7/8”
Patterned Paper (2 Pieces-Front and Back of Flap Panel): 5 1/8 x 6 7/8”

Inside Middle White Panel: 4 13/16 x 6 3/8”
Patterned Paper Strip: 1/2 x 6 3/8”
Creating the Peekaboo Panel
I started out by making the card base using Gina K Designs Heavyweight White cardstock. I scored it in three areas, an eighth of an inch apart for each score. This created a rounded fold, which will help the card front flap to cover over the inside of the card since I was adding bulky dimensional stickers inside.


Next, I added a panel of patterned paper from the Echo Park: A Birthday Wish-Girl Collection to the front and back of the front panel. Then I used the Paper Wishes/Hot Off the Press Fabulous Folded: Windows and Frames Cutting Die Set to cut the window apertures into the card front.
Cutting Tip
I did not think ahead far enough when planning the card ingredients, and had a very difficult time using the die to cut through the heavyweight cardstock and two layers of patterned paper. After trying many different die-cutting sandwiches, I ended up using a craft knife to finish cutting out the windows.
I would recommend adhering the patterned paper using temporary adhesive, die cutting, taking off the top patterned paper layer, lining up the die with the imprints in the cardstock, die cutting again, then taking off the 2nd patterned paper layer and die cutting that. Then adhere all the layers together, lining up the windows. You could also use a lower-weight cardstock for the card base and it should cut through that without issue.
Building the Trifold Card
I cut an additional panel from the White cardstock, and scored it near the edge to give me a tab to adhere the panel to the card base. I snipped off the tab corners at a diagonal so the panel would lay nicely when attached to the card.
I added glue to the tab and added the panel to the inside of the card base, creating the trifold. I used my Scor-Buddy to line up the edges and make sure everything was straight. Then I added panels of the patterned paper to the front and back of the middle panel, and the front and back of the flap panel.

Creating the Window Frames
Because the card base was so thick, I realized that there would be a big gap between the picture frames on the front and back of the front window panel. I discovered that the openings inside the picture frame dies were smaller than the opening left by the big window die. I used the window die twice to cut out the window opening pieces from Simon Says Stamp Dark Chocolate cardstock.
Next, I centered the pieces left from the big window die inside the individual picture frame dies, and cut them out. This left me with a perfect spacing piece that I could place between the picture frames on the front and back of the window flap. I used the picture frame dies to cut out the inside card frames out of pink patterned paper. I added the pink picture frames on the back of the window flap, lining it up with an even border while looking through the window on the front.

I added two layers of spacer pieces to the back of the picture frame and then placed the Dark Chocolate picture frame on the front of the card, lining up all the frame openings. This filled the gap between the frames on the front and the back of the window panel perfectly. I did this for all of the window openings. Check out the video if this explanation is confusing; it’s a bit challenging to explain well in words.

Decorating the Card Flap with Dollar Tree Stickers
After all the picture frames were in place on the window flap, I closed the card and added the pink patterned paper center pieces through the frames on the front, gluing them to the inside card flap. Once all of those were adhered, I opened the card and added sparkly picture frames cut from the Altenew Fairy Dust Glitter Cardstock Pack.
Next came the fun part! I picked out which Dollar Tree Stickers I wanted to use in each window and added them to the inside of the card. I added Paper Wishes Silver Jewel Border Stickers around the outside of the panel to frame the animal stickers.


Decorating the Inside of the Card

I added a White cardstock panel to the middle inside panel and decorated it using the stickers from the Echo Park collection, and also added a patterned paper strip to the left side of the panel. I placed one of the stickers on the back of the card as well. I used all the colors of Paper Wishes Jewel Dazzles stickers in my collection to add a sparkle confetti party to the center panel. Next, I added Gold Heart stickers to the left inside panel, and Silver Jewel Butterflies to the right inside panel.


Envelope to Match
For the matching envelope, I made a 5 1/2 x 7″ envelope on my 1-2-3 Punch Board from We R Memory Keepers, using a piece of the Echo Park patterned paper. I added a couple of the collection stickers on the front of the envelope to decorate it.

For more information on making envelopes for cards of any size, check out my Punch Board playlist on YouTube.
If you are looking for additional ways to decorate envelopes, I have two videos with lots of ideas for that: Five Ways and Five More Ways to Decorate Envelopes.
Step-by-step tutorial:
I hope you enjoyed this project! For more card-making ideas, check out my YouTube playlist and card-making blog posts. I also have an Birthday card playlist available for more card inspiration.
Product Information
Here are the products I used in today’s project. Please consider shopping through my affiliate links, as it greatly helps out my channel at no extra cost to you. Thanks so much for supporting me and my channel!
**Use code EGIDESIGNS for 15% off your order at Glassboard Studio**
|


Additional Products Used:
- Dollar Tree Stickers
- Owls
- Snails
- Dogs
- Cats
- Awards


