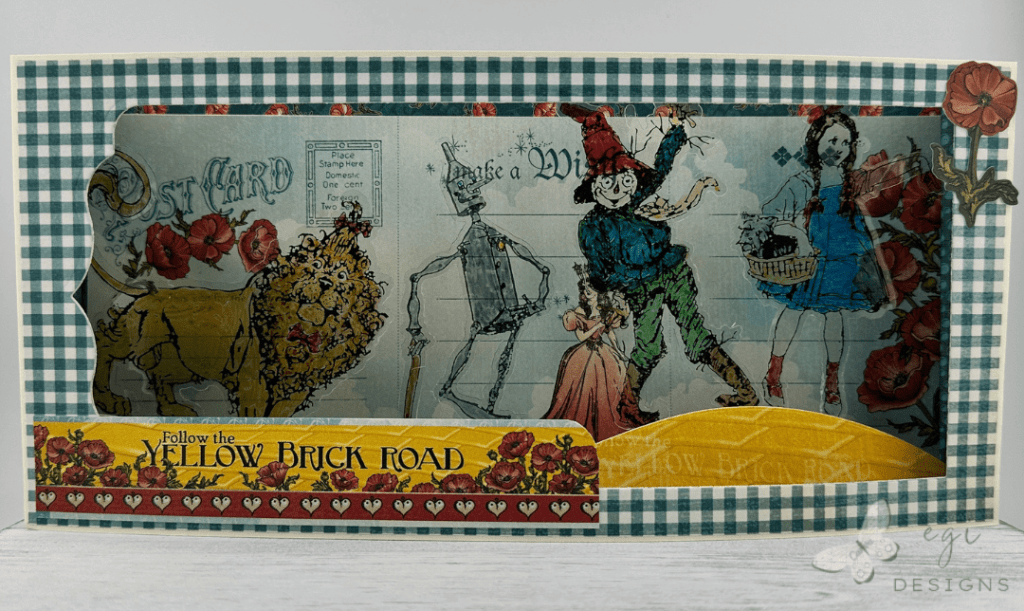
Crafting a Wonder of Oz 3D Shadow Box Card
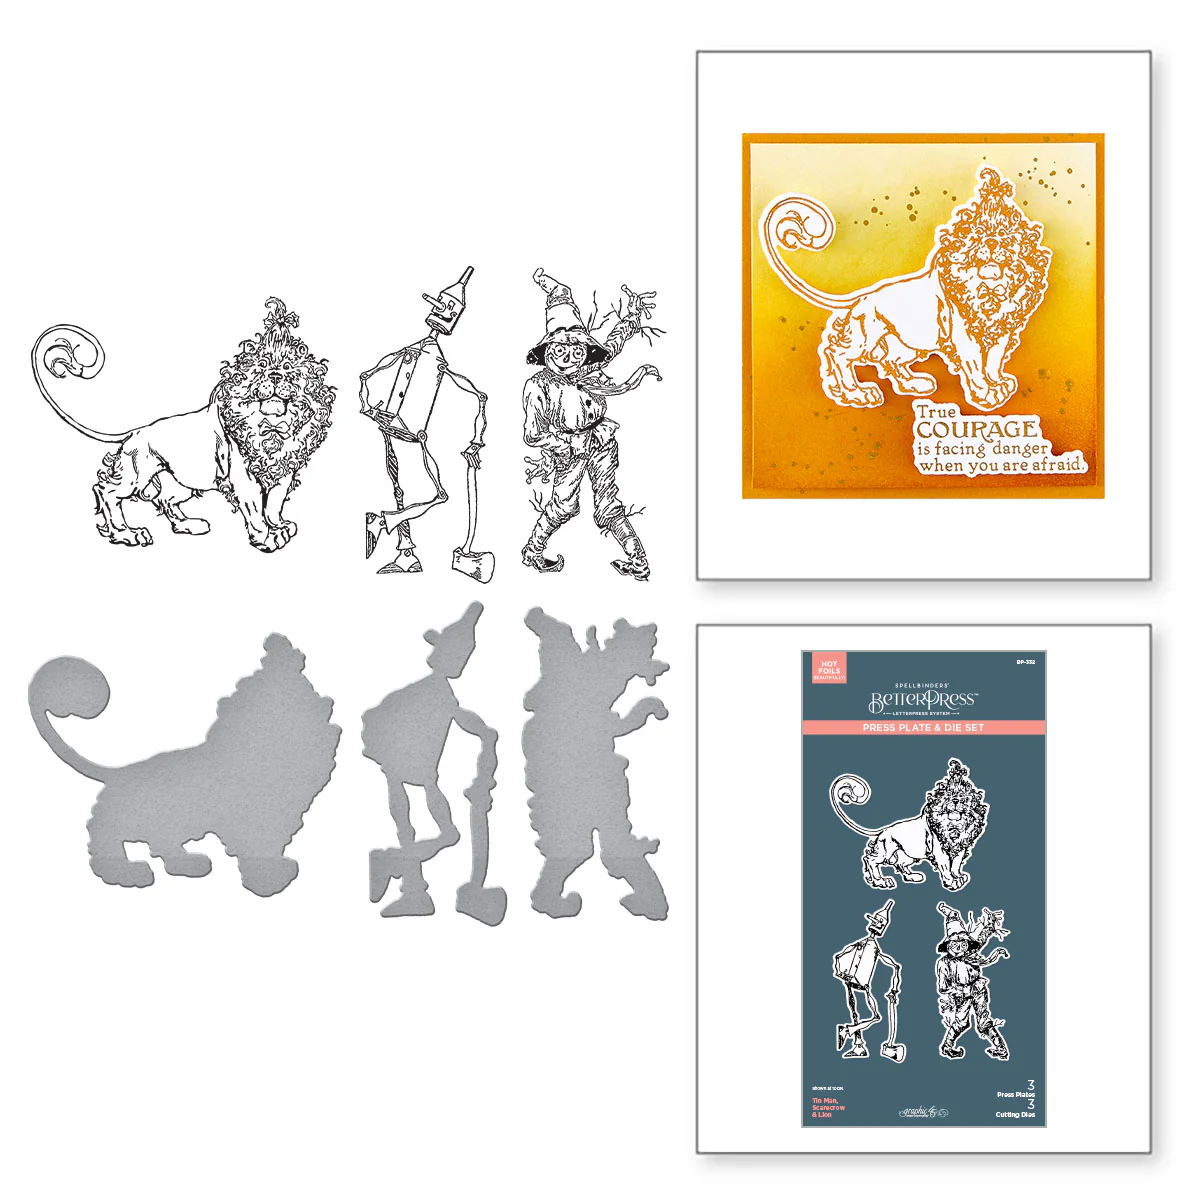
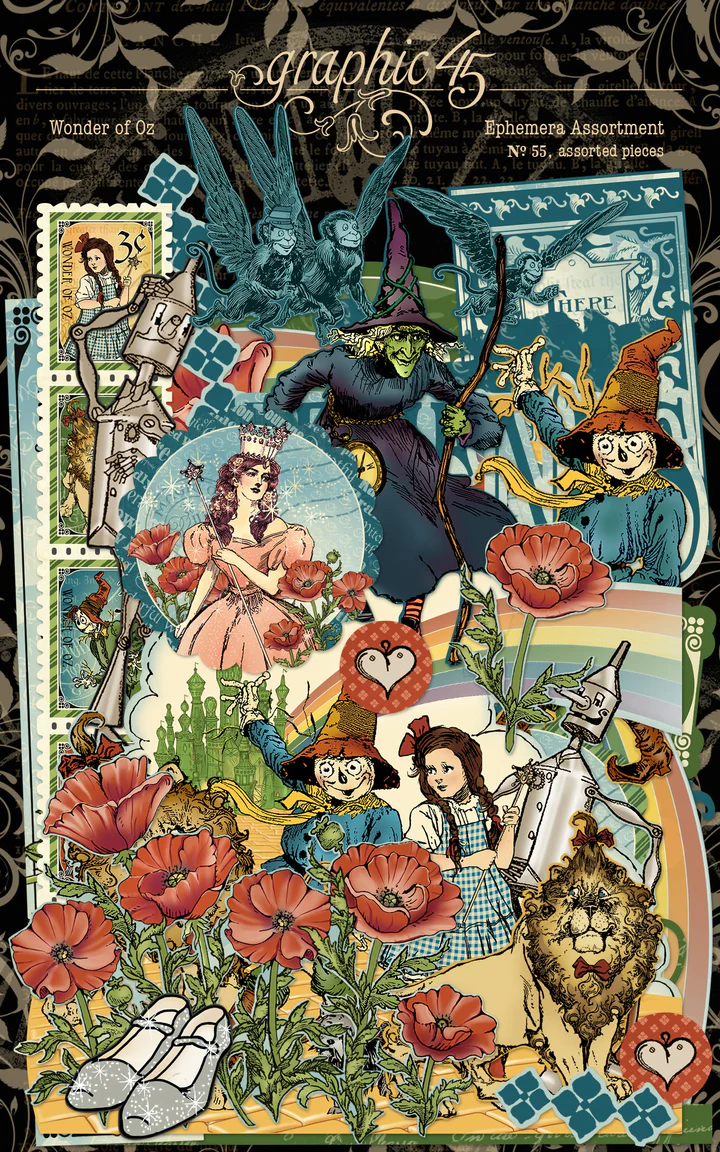
In this video project, I made a shadow box card using the new Spellbinders and Graphic 45 Wonder of Oz Collection. I used the Wonder of Oz 12 x 12″ Collection Pack, Ephemera Pack, Dorothy and the Witches BetterPress plates, and the Tin Man, Scarecrow & Lion BetterPress plates for this card. All products used in making this project are listed below.
Measurements:
Front of Card
Card Front: 9 3/4 x 4 5/8"
Plaid Layer: 9 5/8 x 4 1/2"

Inside of Card
Back Panel: 9 3/4 x 4 5/8"
Poppy Layer: 9 5/8 x 4 1/2"
Patterned Paper: 9 x 4"

Back of Card
Blue Layer: 9 5/8 x 4 1/2"
Poppy Layer: 8 3/4 x 3 5/8"
Panel: 8 1/4 x 3 1/8"

Springs: (2) 3 x 4 5/8", Score at every 1/2"

Bridge: 9 1/2 x 1 1/4"
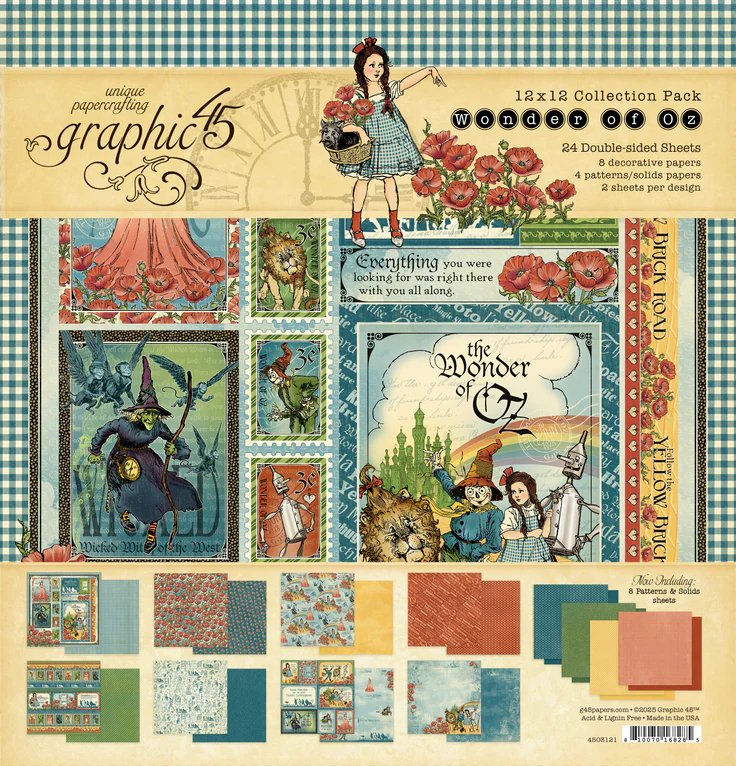
Wonder of Oz Collection from Spellbinders and Graphic 45
The Wonder of Oz Collection is absolutely gorgeous, and it uses the vintage Wizard of Oz illustrations from the books. I have a walkthrough video of the collection over on my corresponding blog post. There are quite a few products in the collection, including: different patterned paper packs and paper sizes, ephemera, stickers, rub-ons, BetterPress Plate sets, an embossing folder, and a die set.
I have another project using this collection where I made a gatefold book-binding card. Check out the video and blog post for more information.
Making the Card Base
For this card, I cut two pieces of Simon Says Stamp Ivory cardstock for the front and back of the shadow box. I added a plaid paper layer from the 12 x 12″ Collection Pack to the front panel and cut a window out of the middle with the Pinkfresh Studio Slim Ornate Banner die set.
I created the two “springs” for the card base sides using the patterned paper. I folded the two pieces in opposite ways so they would be mirror-opposites when attached to the left and right sides of the back card panel. After attaching the springs to the back card panel, I covered the back panel with a piece of poppy patterned paper, then added a piece of the postcard patterned paper on top of that.
For the internal bridge piece, I glued a strip of yellow brick road paper to a strip of the Ivory cardstock to add sturdiness to it, then cut it with the Lawn Fawn Slimline Stitched Hillside Border Die. I attached the bridge to the left and right spring pieces, using 1/4″ Scor-tape to adhere it.


Creating the Scene
In a previous video, I had foiled on acetate using the Spellbinders Dorothy, Tin Man, Scarecrow, and Lion BetterPress Plates. When I cut out the images using the coordinating dies, I used the partial die-cutting technique to leave small tabs near their feet. This gave me a spot to attach them to the bridge piece.
I colored the images on the reverse side using Spectrum Noir TriBlend alcohol markers. Once that was complete, I added scor-tape to the tabs and attached the characters to the Yellow Brick Road card bridge.

Finishing Up the Front
I attached the card front panel to the springs using Scor-tape, then added a border piece from the patterned paper to the bottom left, and a poppy ephemera piece on the top right.
Finishing the Back of the Card
On the back of the card, I added some layered panels from the patterned paper with a center layer of Ivory cardstock, then added some of the ephemera pieces to decorate the panel.

For more ideas on decorating the inside of cards, I have a video with lots of fun ideas for that!
Step-by-step video tutorial:
I hope you enjoyed this project! For more card-making ideas, check out my YouTube playlist and card-making blog posts.
Product Information
Here are the products I used in today’s project. Please consider shopping through my affiliate links, as it greatly helps out my channel at no extra cost to you. Thanks so much for supporting me and my channel!
**Use code EGIDESIGNS for 15% off your order at Glassboard Studio**
|


Additional Products Used:
- Pinkfresh Studio: Slim Ornate Banner Die Set